A portable power station is a finished box. An off-grid system is a set of parts you choose and wire together yourself: panels, a charge controller, a battery bank, an inverter, and the cabling that ties them together.
It's more work, and it's the right call for two reasons. You get far more storage per dollar than any sealed unit, and you can service or expand any single component instead of replacing the whole thing when one part fails.
Below: the five parts, three realistic build sizes, and the system-voltage decision that quietly determines most of your other choices. For the sizing maths, go to the off-grid solar sizing guide. For what a build costs and when it pays for itself, use the payback calculator.
The five parts of any off-grid system
Every build, from a 100W trickle charger to a cabin system, is the same five things.
Panels capture the energy. Rigid panels last longest and suit a roof; flexible panels bend to a curved surface but generally don't last as long. Size them to your daily consumption, not to the space available.
A charge controller sits between panels and battery and manages charging safely. There are two kinds, MPPT and PWM, and the short version is that MPPT harvests meaningfully more from the same panels, especially in cold or overcast conditions — the full argument, including when a cheap PWM is genuinely fine, is in MPPT vs PWM charge controllers.
A battery bank stores what the panels make. LiFePO4 is the standard now: thousands of cycles, stable chemistry, and it tolerates deep discharge in a way lead-acid never did.
An inverter turns the battery's DC into the 120V AC your appliances expect. Match its continuous rating to your largest load and choose pure sine wave for anything with electronics in it.
Wiring, fusing and monitoring is the fifth part, and the one beginners leave out of the budget. Correctly sized cable, a fuse or breaker on every power source, and a shunt-based monitor so you actually know your state of charge. It's unglamorous and it's what separates a system that works for years from one that becomes a problem.
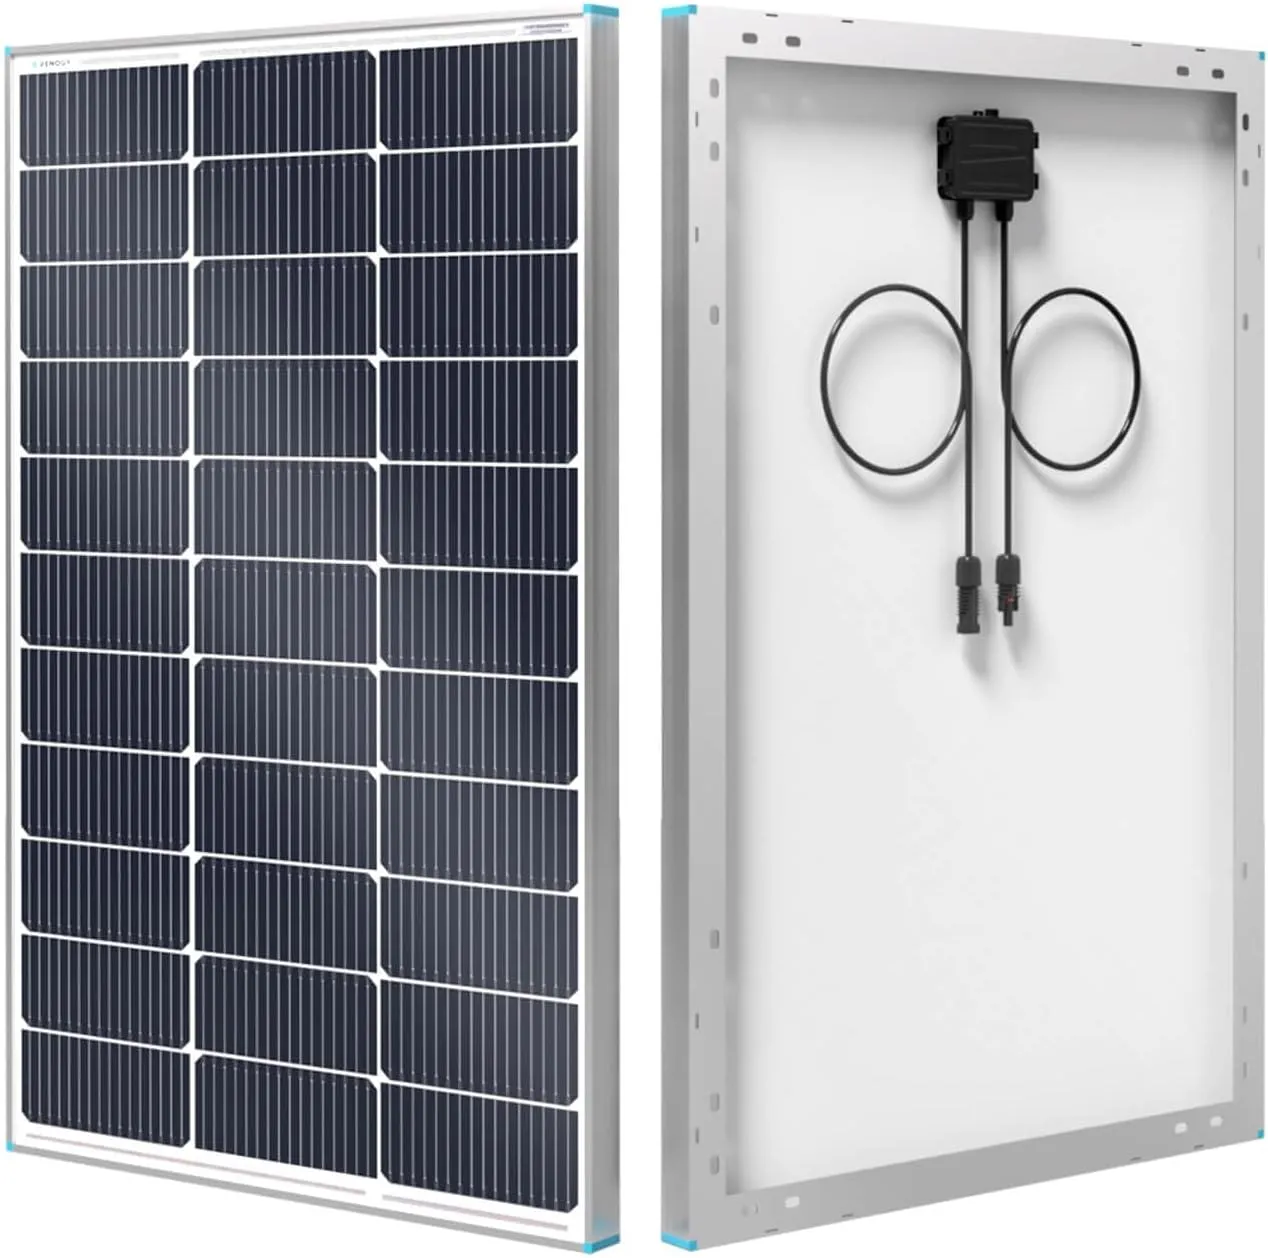
Renogy 100W 12V Solar Panel (N-Type)
What I liked:
- The default DIY building block: 100W at 12V is the unit almost every off-grid tutorial is written around
- Current N-Type 16BB cells rated around 25% efficiency, a real step up from the older PERC version
- IP67 junction box and an aluminium frame built for years on a roof or a trailer
- Cheap and abundant enough that scaling to 200W, 400W or more is just buying more of the same panel
What let me down:
- 100W realistically returns 300-500 Wh on a good day, so the panel count climbs quickly for real loads
- Rigid and framed: heavy and awkward next to flexible or folding panels
- Sold bare, so brackets, cabling and a charge controller are all extra
Where to buy it for the best price
Three build sizes
Most DIY builds land in one of three bands. Picking yours first makes every later decision easier.
The 100W trickle build
One panel, a small controller, one battery. This keeps an RV or boat battery topped up, runs lights and charges devices. It's the cheapest way to learn the wiring without much at stake, and a genuinely useful thing to own even if you later build something bigger.
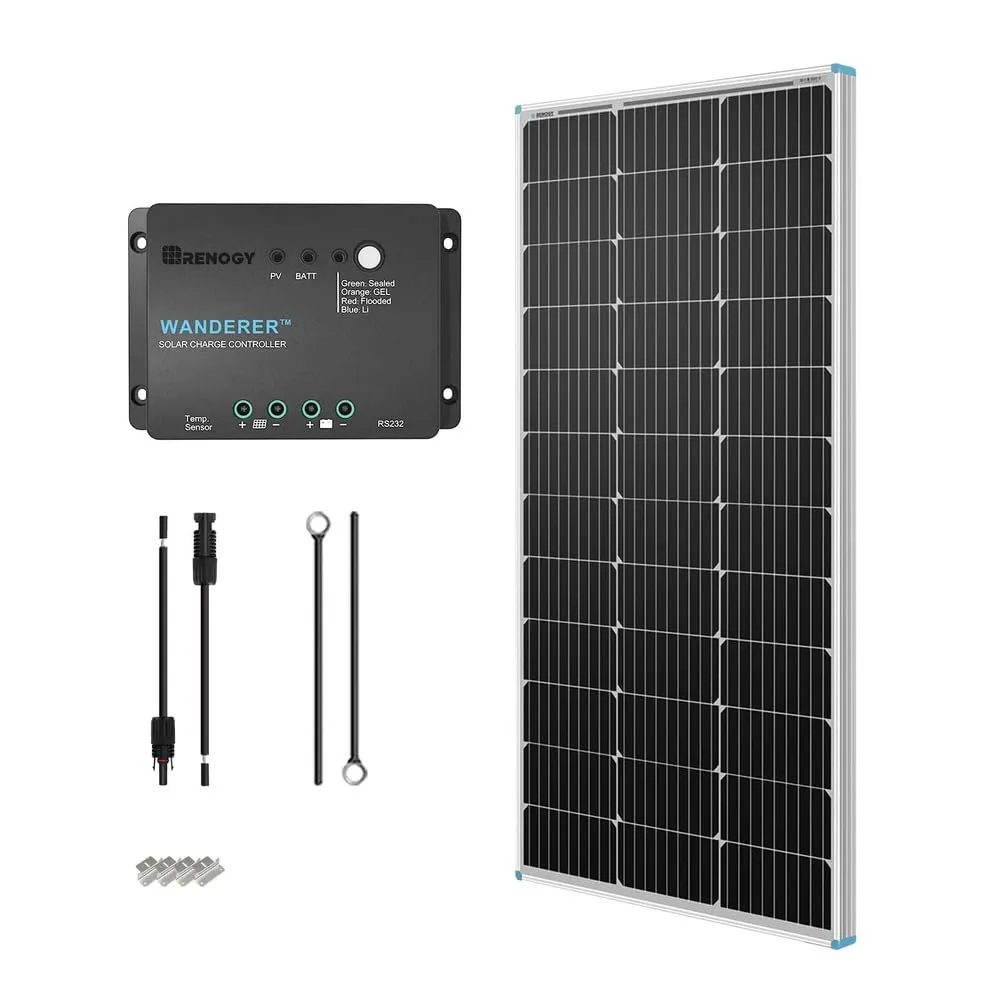
Renogy 100W 12V Solar Panel Starter Kit
The strong points:
- Panel, charge controller, brackets and cabling in one box: nothing missing on install day
- The cheapest honest way to find out whether off-grid solar suits you before scaling up
- The panel and mounting hardware stay useful even after you outgrow the controller
- Well-documented kit, so troubleshooting help is easy to find
The weak points:
- Ships with a PWM controller, which gives up roughly 20-30% of what the panel could deliver
- 100W is a phone-and-lights budget, not a fridge budget
- No battery included, which is usually the most expensive part of the build
Where to buy it for the best price
The 400W van build
Enough to live off for weekends and shoulder seasons: a fridge, lights, laptops, water pump and fans. This is the most common band, and the one where an MPPT controller starts clearly earning its price difference over PWM.
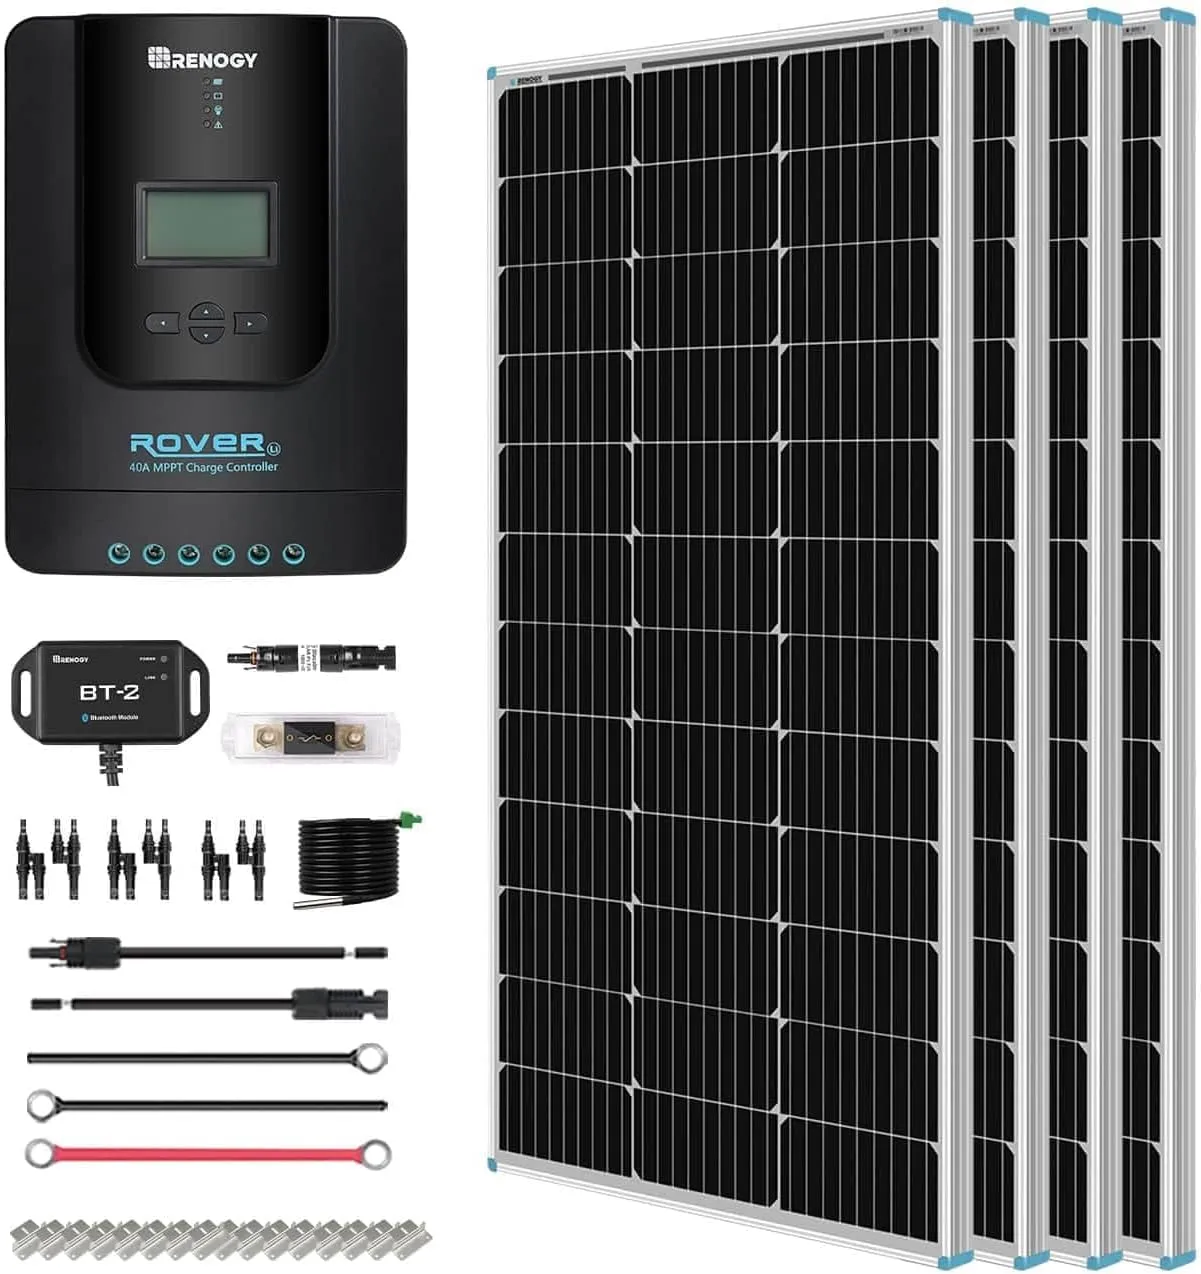
Renogy 400W 12V Premium Solar Kit
The strong points:
- 4x100W plus a 40A MPPT controller: the smallest kit that powers a realistic van or cabin load
- MPPT rather than PWM, worth roughly 20-30% more harvest from the same panels
- Bluetooth module included, so you can see production and battery state from your phone
- Brackets, fuse, adaptor kit and tray cables included: no second parts order
The weak points:
- Still no battery, and that is where the rest of the budget goes
- Four rigid panels need real roof or ground space and proper mounting
- The 40A controller caps you near 520W on a 12V system, so a bigger array means a bigger controller
Where to buy it for the best price
The 800W-plus cabin build
Full-time or near-full-time living, running a fridge continuously plus tools or larger appliances. At this size the system voltage question below stops being academic and starts determining whether your wiring is sane.
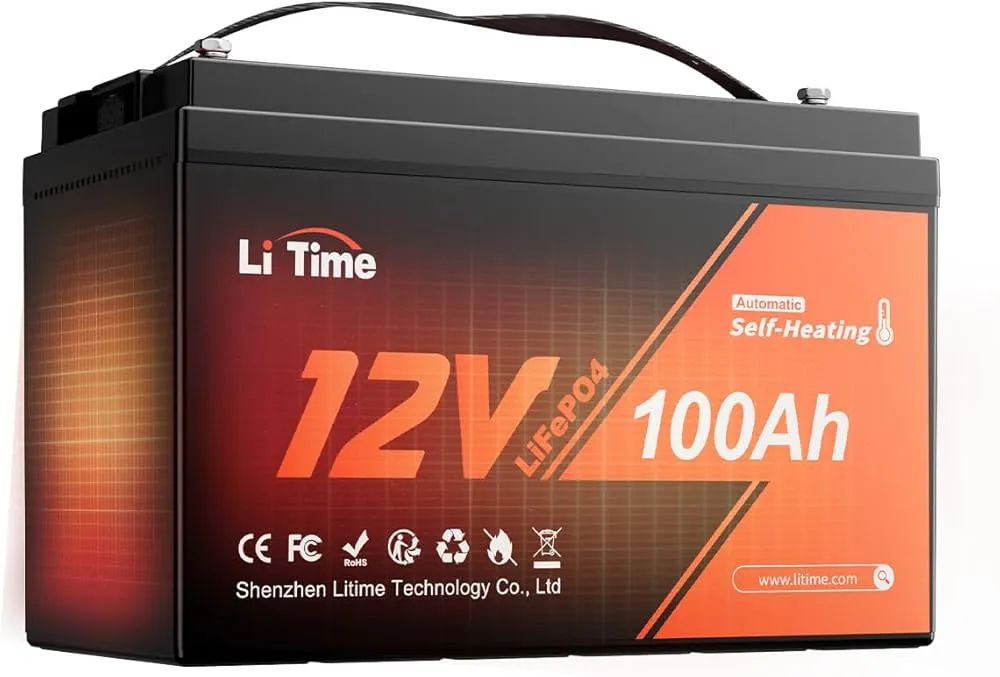
LiTime 12V 100Ah LiFePO4 Battery
What I liked:
- 1,280 Wh of storage for a fraction of what the same capacity costs sealed inside a power station
- Rated for thousands of cycles, against 200-500 for the lead-acid battery it replaces
- About 22 lb, roughly a third the weight of an equivalent lead-acid bank
- Group 31 case and built-in 100A BMS, so it drops into standard battery trays
What let me down:
- No built-in inverter or charger: this is a component, not a finished system
- Charging below freezing damages plain LiFePO4 unless you pay up for a low-temp-protected model
- You still need a charge controller, fusing and wiring, and getting those wrong is the dangerous part
Where to buy it for the best price
12V, 24V or 48V: the choice that shapes everything else
System voltage is the decision people make by accident, usually by buying a 12V battery because that's what the RV store sells, and then discovering it constrains everything downstream.
Here's the principle. Power is volts times amps. To move the same power at a lower voltage you need proportionally more current, and current is what forces thick, expensive cable and large fuses, and what turns into waste heat in your wiring. Doubling your system voltage halves the current for the same power.
12V is the default for RVs, vans and boats because everything in that world is already 12V: lights, fans, water pumps, fridges. It's the simplest to shop for. It gets awkward above roughly a kilowatt of continuous load, where the cable sizes stop being reasonable.
24V is the middle ground for larger vans and small cabins. Halves your current, and there's decent component availability, though you'll need converters for any 12V accessories you keep.
48V is where serious cabin and whole-house systems live. Thin cable, high efficiency, and it's what most modern high-capacity inverters expect. The trade-off is that 12V accessories need a converter and the component ecosystem is more specialised.
The practical rule: choose the voltage for the biggest load you'll ever run, not the one you're starting with. Changing it later means replacing the battery bank, the controller and the inverter — effectively rebuilding.
What will it cost, and what will it save?
Off-grid economics work differently from grid-tied solar. You're usually not offsetting a utility bill, you're replacing generator fuel, campsite hookup fees, or the cost of running a grid line to somewhere remote.
Solar payback calculator
Without a battery or net metering, surplus produced while you are away flows back to the grid.
Production / year
810 kWh
Savings / year
$91
Payback
9.9 yrs
Rough estimate: real output depends on orientation, tilt, shading, and weather. A south-facing array with no shade produces far more than a north-facing one.
Estimate your own payback →The assumptions behind that estimate, and what pushes payback up or down, are explained on the off-grid solar payback calculator.
The components I actually use
The individual components below are gear I bought and wired into my own builds; the two bundled kits are the packaged versions of those same parts, which I've costed out rather than ordered. Each card says which is which. Ratings are my own editorial scores — the method is in how I rate products.
| Model | Rating | |
|---|---|---|
Victron SmartSolar MPPT 100/30 Victron Energy | 4.8 | Check price |
Renogy 100W 12V Solar Panel (N-Type) Renogy | 4.5 | Check price |
Renogy 400W 12V Premium Solar Kit Renogy | 4.5 | Check price |
LiTime 12V 100Ah LiFePO4 Battery LiTime | 4.5 | Check price |
Renogy 100W 12V Solar Panel Starter Kit Renogy | 4.3 | Check price |
Renogy Rover 40A MPPT Charge Controller Renogy | 4.3 | Check price |
Panels, kits, battery and controllers · Partner links · prices shown on the retailer page.
Longer write-ups are in my off-grid gear reviews — the Renogy 100W panel review is the one to start with, since that panel is the default building block for most first builds. Component face-offs are in off-grid solar comparisons, the full sizing method in my off-grid buying guides, and the cost estimates in the off-grid solar calculators.
When not to build it yourself
Building is the right answer when the system lives somewhere permanently and you want capacity per dollar. It's the wrong answer twice.
If you want power that travels and you'd rather not wire anything, buy a finished unit: a portable power station gives you a battery, inverter and outlets in one box, at a higher cost per watt-hour but zero assembly.
If the goal is keeping a grid-connected house alive during outages, off-grid is the wrong frame entirely — you want home backup batteries, where the hard part is how the power reaches your circuits rather than how you charge it.